
Installation Guidance
Part 1 – Fence Panels Buying Guide
Why are you looking to buy a new fence? It could be for any of the following reasons:
- You want to give your garden a makeover
- You have recently moved into a new property
- Your fence has been damaged by a storm or flooding
- Your existing fence has started to rot and fall apart
These, and many others, are great reasons as to why you might want to build a fence and purchase fence panels.
If it’s the first time you’ve ever bought fencing the varying range of styles and designs might be overwhelming. What does the treatment mean? Do I want traditional fencing or more decorative contemporary fencing? Which fence actually belongs to me?
Our informative guide to buying a fence will help you answer some of these questions and more that will most likely pop up along the way.
Let’s get down to creating your fence.
Our user-friendly guide will cover the following topics and answer the question “How do I decide which fence to buy?”
- Size matters
- Style – Traditional or Decorative?
- Other Fence types available
- Fences for special purposes
- Treatment
- Gates
Once you have completed the steps above and you have everything you need to buy your fence, we will help with the following.
- Installation guide
- Taking delivery
Fencing Guide Step 1 – Size Matters
Fence panels come in standard sizes. These are usually 6ft and heights of 3ft, 4ft, 5ft or 6ft. Trellis panels also come in standard sizes of 1ft or 2ft. They are usually used as fence toppers or trellis panels.
3ft and 4ft panels can usually be found as low level fencing such as a garden boundary.
Larger fences such as 5ft and 6ft provide security, not to mention privacy from nosy and noisy nuisance neighbours.
Bear in mind that sizes are approximations, and may differ slightly. There are also some limitations in place on how high your fence can be. Generally speaking a fence in a property’s back garden cannot exceed 6ft. Front and garden fences should not exceed approximately 3ft.
(Link to Popular Fence Panel Sizes)???
Fencing Guide Step 2 – What’s your style? Traditional or Decorative?
You will encounter the terms Overlap, Featheredge, Picket and Closeboard. These are standard names for our traditional fencing products that are used for creating firm and practical garden boundaries (such as 6 x 6 ft fence panels used for privacy and security.
Decorating fencing can also be used to create a boundary but it also provides an attractive frame for your garden. Our products in the decorative range can be identified by the terms Slatted, Hit & Miss and Lattice fencing.
The names of various types of fencing are determined by how they are constructed. Let’s explore further:
There are four main categories referred to as traditional fence construction.
They are: Overlap, Featheredge, Picket and Closeboard.
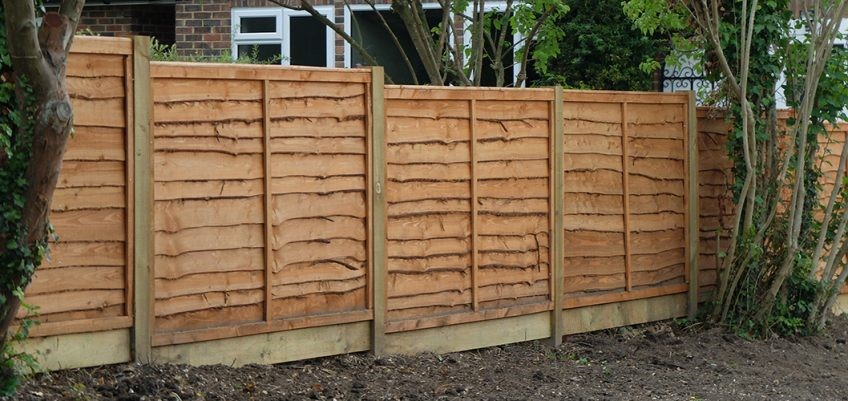
Overlap Fencing
- Horizontal boards that overlap to offer high levels of security at a reasonable price
- Available in either a waney edge or straight cut finish
- Offers privacy and security from nosy and noisy neighbours
- Our most economic fence panel construction
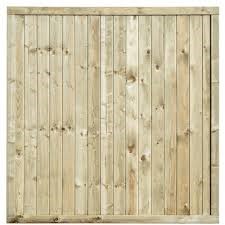
Featheredge Fencing
- Overlapping horizontal boards reinforced by horizontal battens at the rear
- Boards are tapered to feature a thinner and thicker edge
- Offers privacy and security from nosy and noisy neighbours
- Heavy duty featheredge features thicker boards and more supporting battens
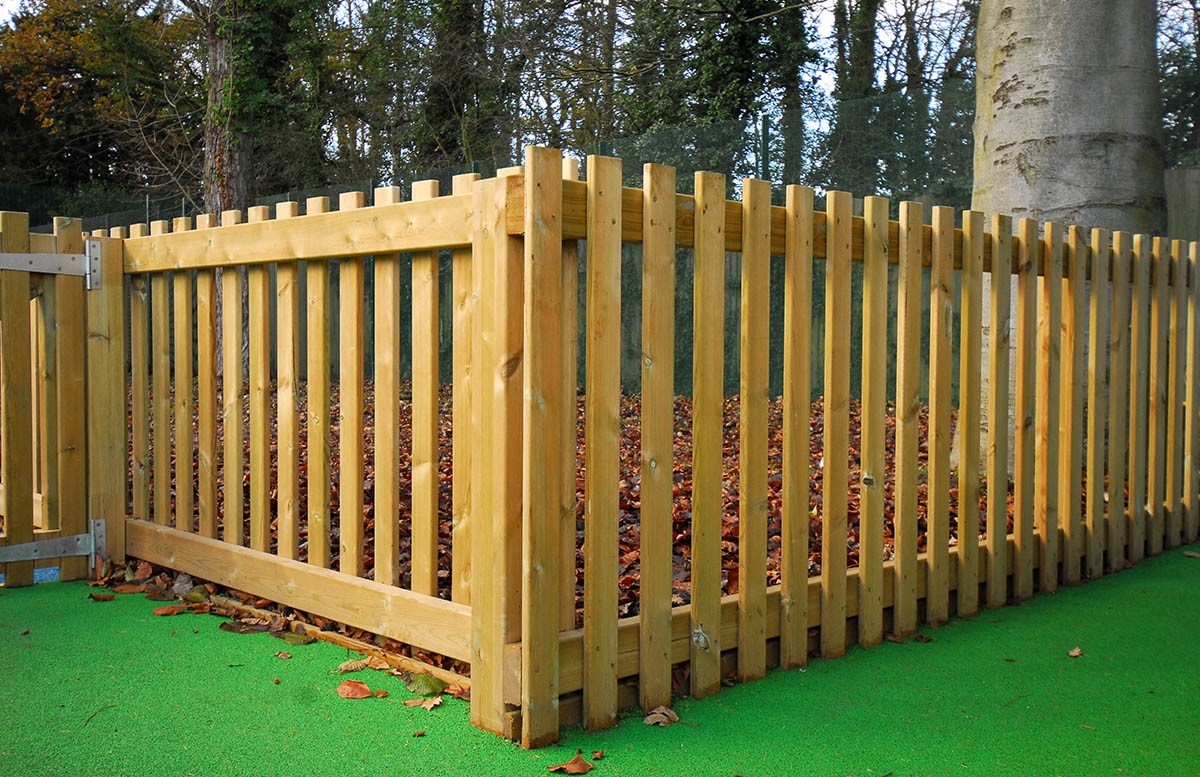
Picket Fencing
- An open construction of spaced pales fixed to a horizontal rail
- A traditional yet decorative fence style perfectly suited for front garden boundaries
- Showcases your garden
- Matching gates available
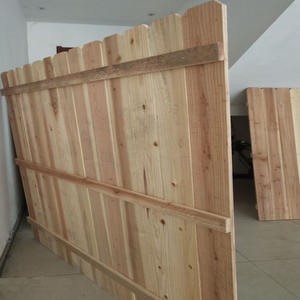
Closeboard Fencing
- Overlapping vertical boards supported by horizontal battens at the rear
- Generally feature an additional supporting batten
- Offers privacy and security from nosy and noisy neighbours
- Perimeter frame provides additional strength and security
There are four main categories referred to as decorative fence construction. They are Tongue & Groove, Hit & Miss, Slatted and Lattice Fencing.
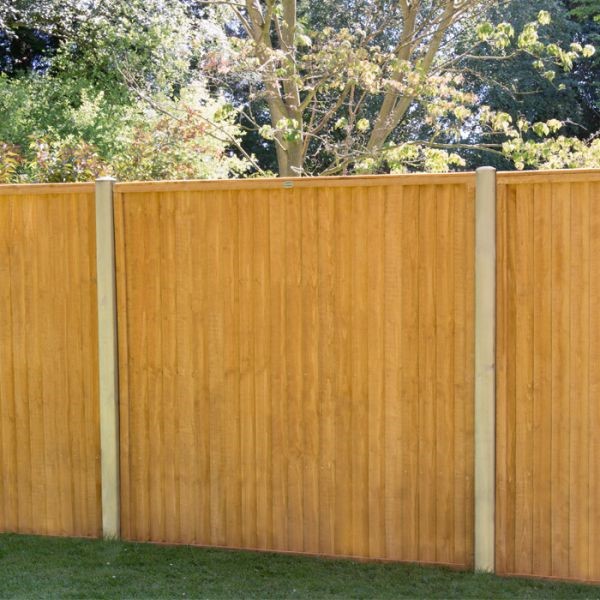
 Tongue and Groove Fencing
- High-specification fence panels that feature inter-locking boards
- Fence boards are fully-framed to provide additional strength and security
- Smooth-planed timber boards provide a contemporary, stylish finish
- Offers privacy and security from nosy and noisy neighbours
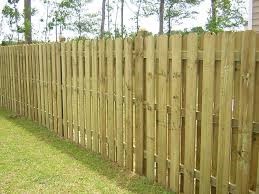 Hit and Miss Fencing
- Boards attached alternately to front and back of supporting battens
- Supplied with either horizontal or vertical boards
- Decorative alternating pattern to make your garden stand out
- Special design allows air to pass through and increases stability
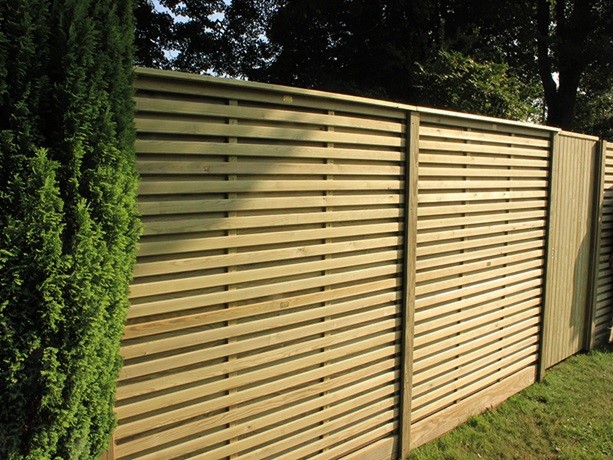 Slatted Fencing
- Contemporary design horizontal slats
- Available in single slats for partial screening or double-slats to provide additional privacy
- Double-slatted fences offer the same appearance from both sides
- Pre-painted versions also available in anthracite grey
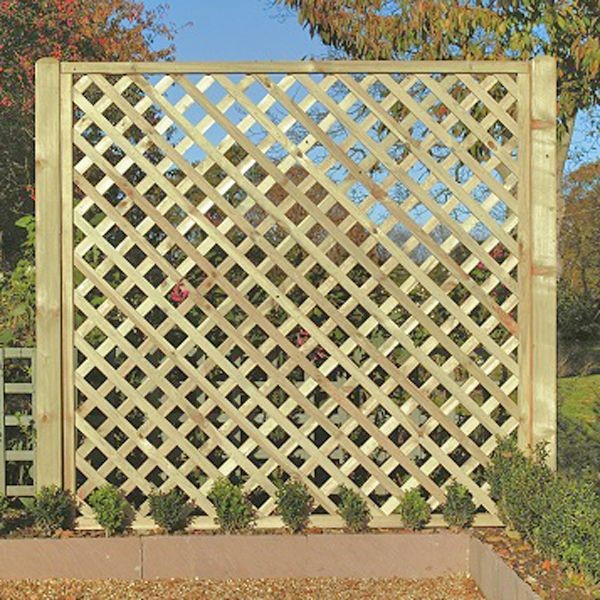 Lattice Fencing
- Can be used as open garden screening
- Trellis designs can be used to train climbing plants
- An excellent solution for partitioning off areas within the garden
- An attractive look for your garden
Other Fence Types
In addition to the fencing types mentioned above there are also some other fencing styles you may wish to consider some of the following options available:
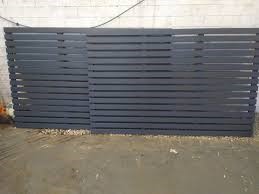 Grey Fencing
- Pre-painted for convenience to save you time and money
- Anthracite grey is currently the in-trend colour
- Looks stylish and modern
- Stand out from the crowd and amaze your neighbours
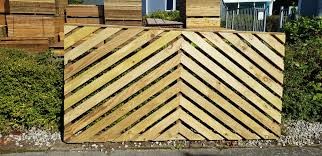 Chevron Fencing
- Boards attached to the fence in a diagonal pattern
- Creates a unique decorative shape
- Provides privacy and security
- An attractive look for your garden
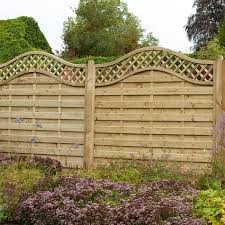 Dome Top Fencing
- Fence panels feature either a curved dome or wavetop outline
- Available on a range of panel constructions
- Provides privacy and security
- An attractive look for your garden
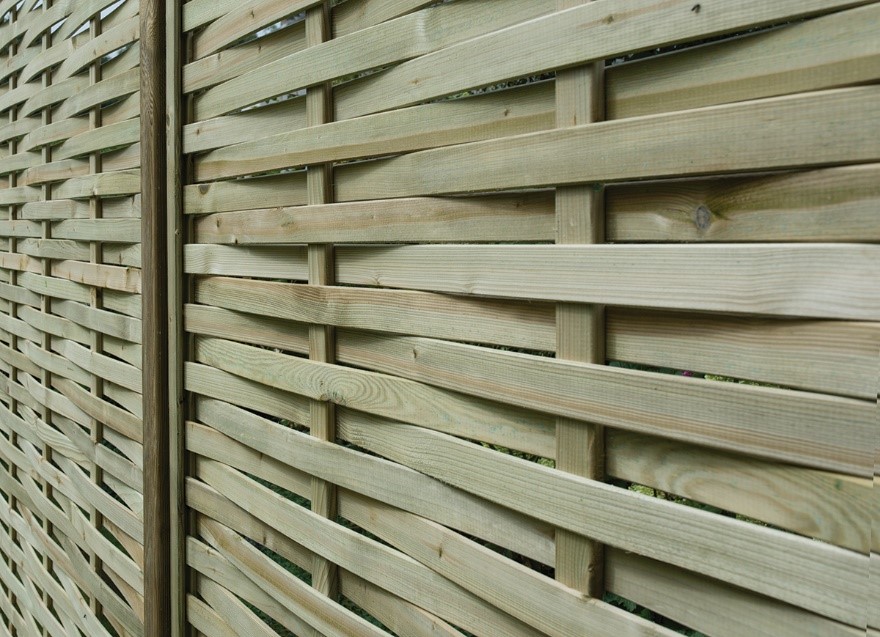 Woven Fencing
- Horizontally-placed boards weave in a pattern supported by three vertical battens
- Decorative finish adds style to your garden
- Provides privacy and security
- An attractive look for your garden
Fencing Guide Step 3 Special Purpose Fencing – What Might you Need it for?
Noise Reduction
Constant noise from outside can be irritating and a real problem. Perhaps you need to reduce noise from a busy road, nearby school or other noisy area. If so, we have a solution – our technologically advanced tongue and groove decibel noise reduction panels are ideal for this purpose.
Fencing for Uneven Ground
It’s not unusual if your garden is uneven or on a slope you will probably need to ‘step’ your fencing. Please refer to our ‘Installing a Fence’ section below for some more details. However, if your garden is very uneven you may be better off using a selection of fence boards rather than panels to create your very own garden fence style.
Wind Protection
If you live at the top of a hill or in a particularly windy or exposed area then you should consider looking at boards that have some spacing in-between boards. This is in order to reduce tension on the fence, and will help your fence to withstand strong winds. For this we recommend our ‘Hit and Miss’ fence panels. Small gaps in the board allow wind to pass through, rather than push against, the panel, thereby making it more flexible. If you prefer solid fencing for privacy we recommend that you use longer fence posts and slotted fence posts.
Fencing on Concrete
If fencing on concrete you can use the same fence panels and fence posts that you would for grassy areas in your back garden. However, in order to provide support, you will definitely need a fence post shoe (also commonly referred to as a bolt-down fence post support). This provides stability for the fence post, as it is fixed into the shoe, which is then bolted to the ground in the concrete. Please bear in mind that, unlike fence posts used in grassy areas, fence posts that are bolted into shoes do not require extra length for being inserted below ground.
Wall fencing
There are a few options available if you intend to add fencing on top of a wall, such as a low garden boundary wall, for example. Depending on the width of the wall it may be possible to use fence post shoes (as indicated above). However, if the wall is not thick enough, there is a possibility that the fence could be damaged during the drilling process. In this instance the solution would to be bolt fence posts to the side of the wall, or into the ground at the bottom of the wall. If a fence features brick columns, you could use arris rails to support individual fence panels.
Fencing Guide Step 4 – what treatment should I use?
Dip Treatment – What Does ‘Dip Treatment’ Mean?
Dip treated fence panels usually have an orange/amber colour finish. Dip-treating is the quickest, and cheapest, method of applying preservatives to timber. Wood is dipped in the preservative, coating it with a covering on the surface. It does not last as long as pressure-treatment so requires annual top-up applications of preservative to maintain protection. Our dip-treated timber comes with a 10-year anti-rot guarantee, if supported by regular top-up treatment, as standard. You will need to re-apply wood preservative once a year to maintain the condition of your garden furniture. In order to avoid damage caused by damp contact with the ground should be avoided where possible. The average lifespan of a dip-treated fence panel is 15 years.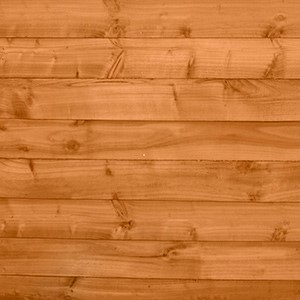
Pressure Treatment
What does ‘pressure treatment’ mean?
Pressure-treated fence panels undergo a different process where, as the name suggests, wood preservative is forced deep into the grain of the wood using high pressure. In general they have a much lighter colour. Initially there may even be a slightly green or blue tinge, but this soon passes with time. The process imparts the timber with the qualities of the preservative, which means that a longer life is provided. Anti-rot guarantees can be for up to as much as 15 years.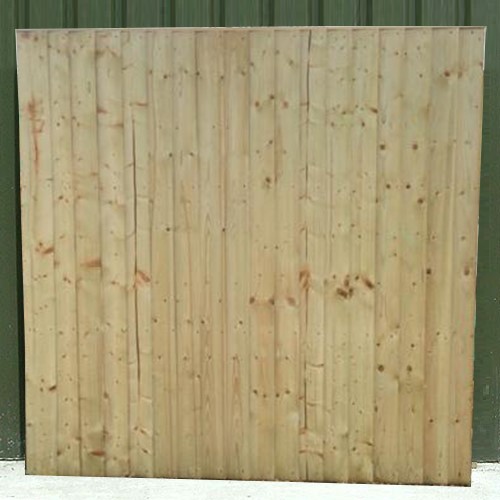
Question – Which type of fencing should I choose?
The type of fencing you decide to buy is a matter of both your budget and your time.
Dip-treated panels are cost effective, all you have to pay for additionally is the annual top-ups for re-applying the coating. If you have a big garden the costs will mount up. Pressure treated fencing is initially more expensive, but over the time the benefits will outweigh the costs.
Practical consideration- Which fence belongs to me?
This is one of the most Frequently Asked Questions. Which fence is mine? In actual fact there is no hard and fast rule about whether you own the fence on the right or the left side of your house. Information about any established boundary agreement is usually to be found in the conveyance deed. The easiest way to establish this is to contact the Land Registry from where you can obtain an ‘office copy’ that comprises of title plan and register details. If an agreement has been made that indicates that you and your neighbour are both responsible then this is referred to as a ‘party’ fence, where you share responsibility. It is standard practice that the finished side of your fence should face your neighbour. It is not only a mark of respect to your neighbour but it shows off your best side to the outside world.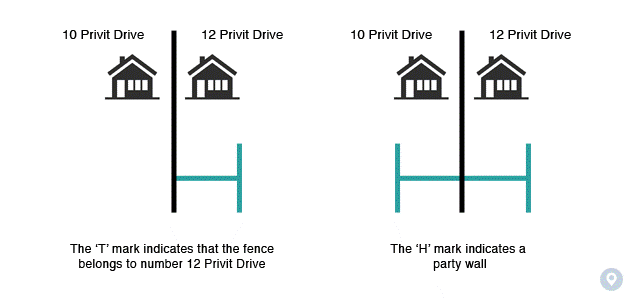
Fencing Guide Step 5 – Gates
Garden gates are a practical addition to your fence that doesn’t have to be intrusive. Some fences may require an access gate to complete the fencing run.
Gates have two distinct purposes:
- A full side gate that provides security and privacy
- A lower gate that provides a decorative entrance point into your front garden
The majority of our fence panel ranges come with an accompanying gate to match. This will help you in creating a cohesive and stylish design for your garden border.
Fencing Guide Step 6 – Posts and Access
Do I need Wooden or Concrete Fence posts?
Wooden posts must be pressure treated because they are inserted into the ground. Pressure treatment offers greater resistance to damp. Wood is often chosen for fence posts as it clearly has a more natural aesthetic appeal and is more flexible and moveable.
Concrete posts are stronger and more durable, but less pleasing on the eye than timber. The key advantage of using concrete over timber is that very little maintenance is required once installed.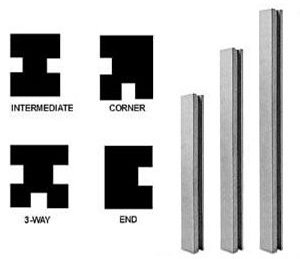
How tall should my fence posts be?
Conventional practice advises that approximately one third of your fence post or at least 2 ft underground. So, for example, if you were looking at a 5ft fence you would require a 7 ft fence post. However, if you are using a gravel board to raise your fence panel, this also needs to be taken into consideration.
Do I need post caps or finials?
The most vulnerable area of the fence post is the end part above ground as it bears the brunt of everything the elements has to throw at it. The advantage of using a fence post cap is that they provide another layer of protection against moisture and slight angling deters sitting water. Finials are more decorative, so the final choice is completely yours.
Do I need a gravel board?
We strongly recommend the use of gravel boards if you are purchasing dip-treated fence panels. Gravel boards come either as heavy duty durable concrete or pressure-treated timber. These will protect the base of your fence panels from damp. In addition, gravel boards provide a sturdy surface for your fence to rest on to take some of the strain away from the fixings during heavy winds or changes in temperature. The choice of using either concrete or timber gravel boards is completely up to you.
Checklist – do you have everything you need?
- Fence panels
- Fence posts
- Gravel boards
- Gate (if required)
- Gate hinges & latch
- Fence posts and finials
- Fence brackets
- Fence post bolt down supports (when fencing into concrete)
Installation Guide
Whether you have decided to install your own fence by yourself or you’re hiring a professional we can help. Please take into consideration that if you are building a fence on sloped ground you need to follow a slightly different installation process. You will have a ‘stepped’ fence, where the fence posts should always be as tall as the higher panel of each adjacent pair of panels. Panels should be kept level. Gravel boards are essential and will probably need to be partially inserted into the ground. Although we don’t provide our own videos there is a range of resources online for you to use. If necessary we can connect you with professionals to assist with this. Please see some general common sense based on the experience of expert professionals below:
Planning & Preparation
- It is essential that you plan your fence carefully before starting your project, because this will limit any cutting and wastage. Even more importantly – it will also help you to order the amount of materials you require, saving you both money and time.
- We recommend using a detector to check the area for any underground cables and pipes to ensure that you can dig the necessary holes along your fence line.
- Check local planning regulations. The general rule is that you can build a fence up to 2m high in your back garden without requiring planning permission, but it’s always sensible to check with your local planning office if the restrictions in place aren’t clear.
- When you are installing a fence that runs adjacent to your neighbour’s garden please ensure that you consult them about your plans well in advance. You will also need to check that they are happy for you, or hired contractors, to access their garden. It’s much easier to work from both sides of the fence.
- We recommend that you factor the weather into your plans. Although it is possible to install a fence all year round it’s sensible to avoid extremes of weather. Avoid very hot and very cold weather wherever possible. Extreme wet weather should also be avoided.
- If you plan to be securing your posts with concrete you will require 8ft posts for a 6ft fence – approximately 2ft of the post will be underground. If you intend to use post-spikes or bolt-down post sockets you will only require 6ft posts.
- If you are planning to add a gravel board or trellis to your fence please factor it into your plans. The size may determine the length of fence posts required.
Get it Right
- We recommend that you soak the base of the post in wood preservative prior to installation to ensure longer life.
- We advise that you only use treated wood and exterior grade screws in order to prevent premature rotting and rusting.
- We recommend that all panels, even pressure-treated panels, should be raised a minimum of 50mm above ground level in order to prevent rotting.
- When installing a fence on a sloped are keep the fence panels horizontal, but be sure to fill the angled gap by cutting the gravel board to size. In order to make accurate angled cuts you will need to use a circular saw or jig saw. Heavily sloped and uneven areas require alternative installation methods, so we recommend that you seek advice as the method depends on the specifics of your particular garden and the slope gradient.
- Although some people like to think they can build a deck on their own, the results will be better with an extra pair of hands. Rope in a friend or relative to help you with it.
Stay Safe
- We recommend wearing a dust mask, safety goggles and protective gloves at all times when using concrete. It is essential that you adhere to instructions provided by the manufacturer. Remember, they’re talking from experience!
- Even though it may already be second nature always ensure that you wear protective gloves when handling wood, or applying wood preserver. It is imperative that you adhere to instructions provided by the manufacturer. Remember, they’re talking from experience!
- Always wear goggles whenever you’re drilling a hole. Remember woodwork lessons at school?
- Please research local resources for re-cycling timber offcuts.
Installation Guide: Installing Fencing Step by Step
Step 1: Remove Debris
Preparation is the most important steps, and it will save time and effort if you do it properly at the beginning.
We recommend that:
- You remove any debris (stones, rock etc.) from your desired fencing area.
- Dig up and remove any small bushes and plants that you want to replace once the fence has been installed.
This clears the way for you to get down to installing your fencing.
Step 2: Mark Boundaries
You need to know where your fence is going to be. Mark out the boundary clearly with the use of a hole-digger or spade. We recommend that you dig a hole that corresponds to the length of the post you are going to use. Usually this is approximately 600mm x 300mm square.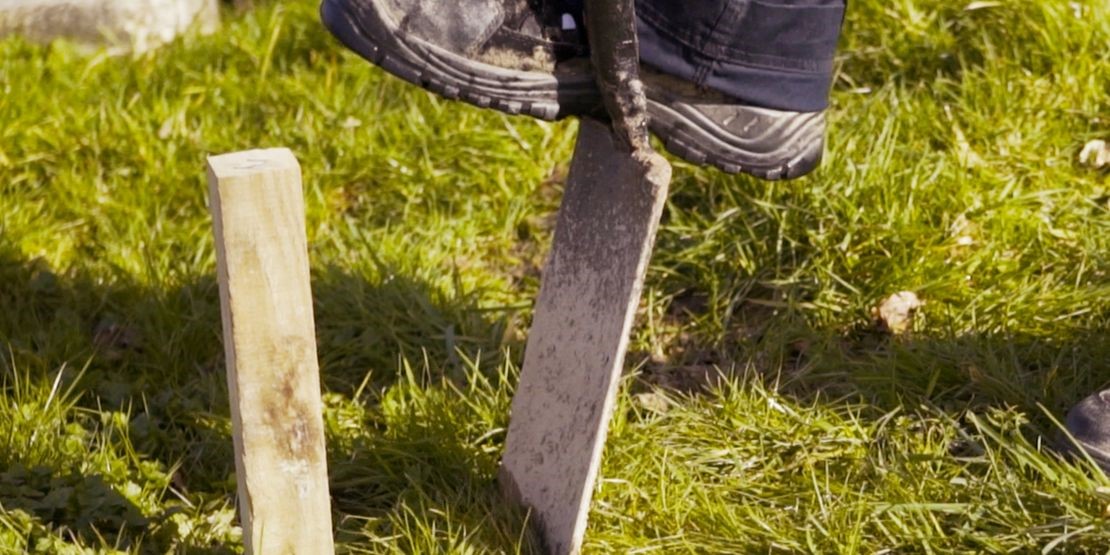
Step 3: Draining Effort
In order to provide drainage we highly recommend that you use some gravel in your freshly-dug hole. Over time this will help to prevent the post from rotting and will help ensure longer life.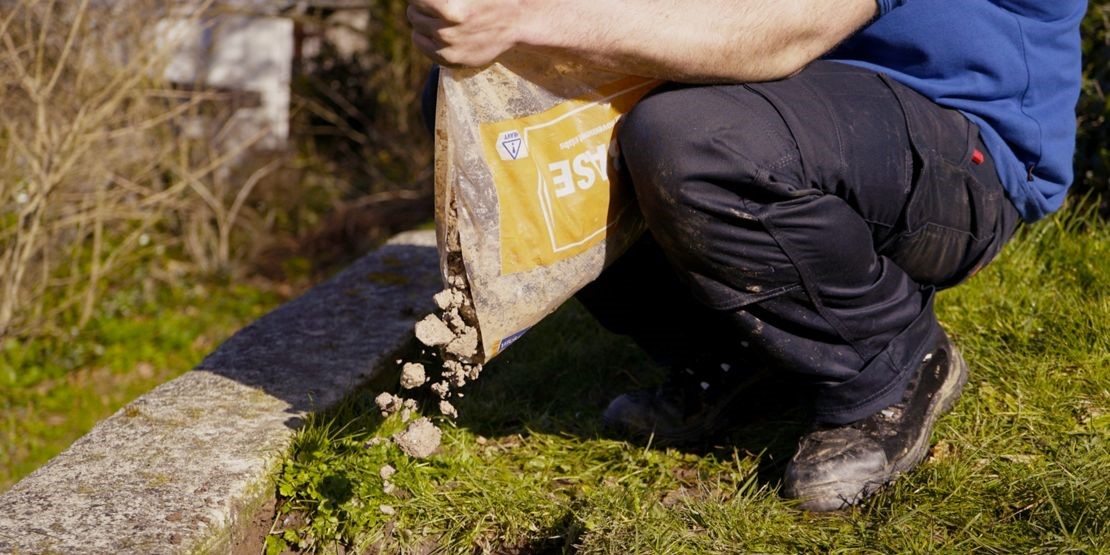
Step 4: Setting Up
Firmly insert a length of the post into the hole. By using a spirit level you can check that the post is perfectly vertical on two adjacent sides. Secure the post in place by attaching it to pieces of timber.
Step 5: Concrete Plans
Add concrete to the hole to ensure that it is more firm, following the instructions provided by the manufacturer.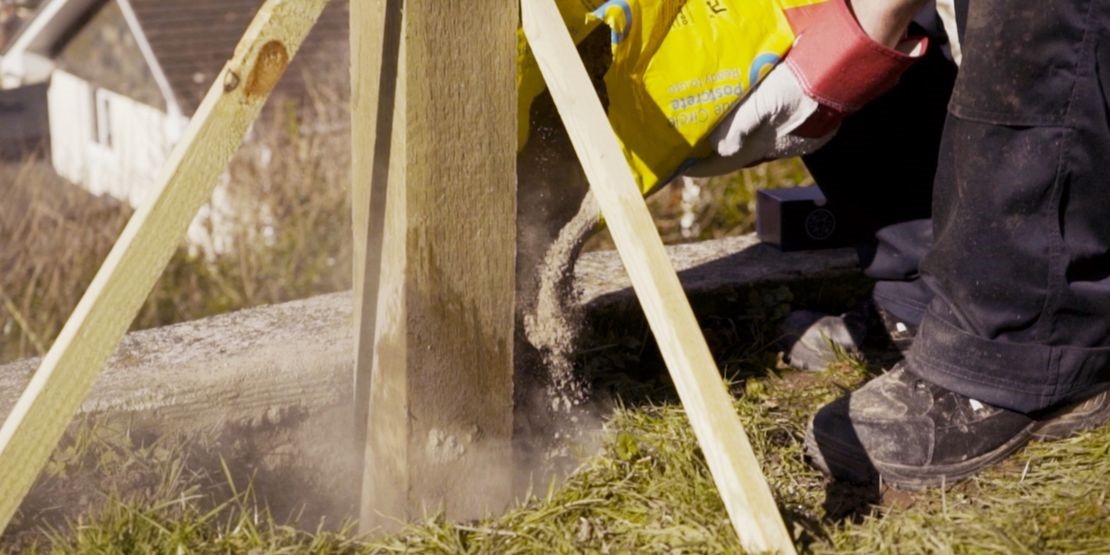
Step 6: Smoothening it Out
Once the wet concrete is in place use a trowel to smooth around the edges. We recommend that you create a slight slope in order to facilitate the drainage of rain water. Once the concrete has set firmly around the post remember to remove the timber posts.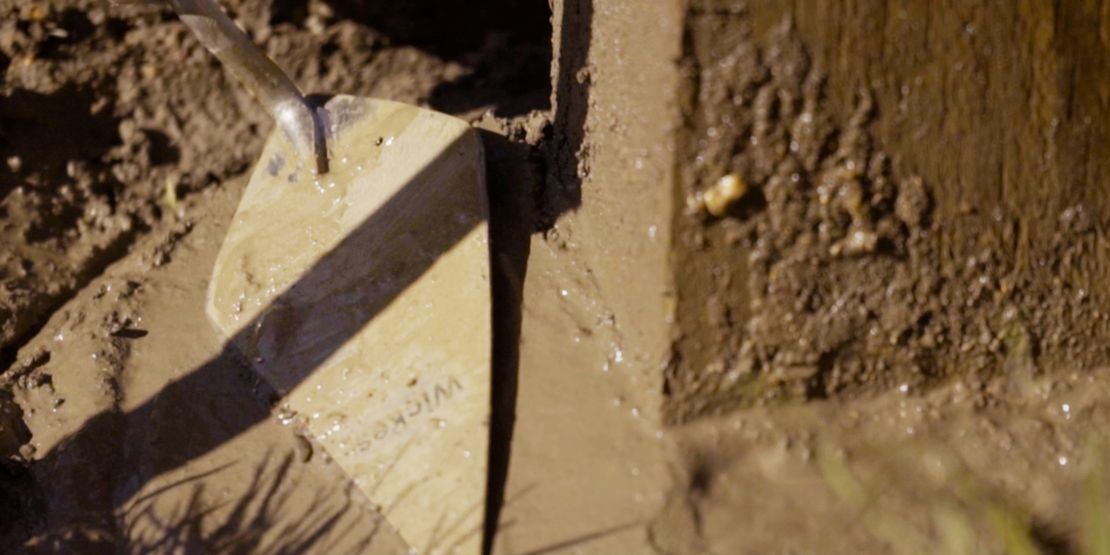
Step 7: Mark your Ground
We recommend that you clearly define and mark the line of the fence by using stakes and a string line (pulled taut).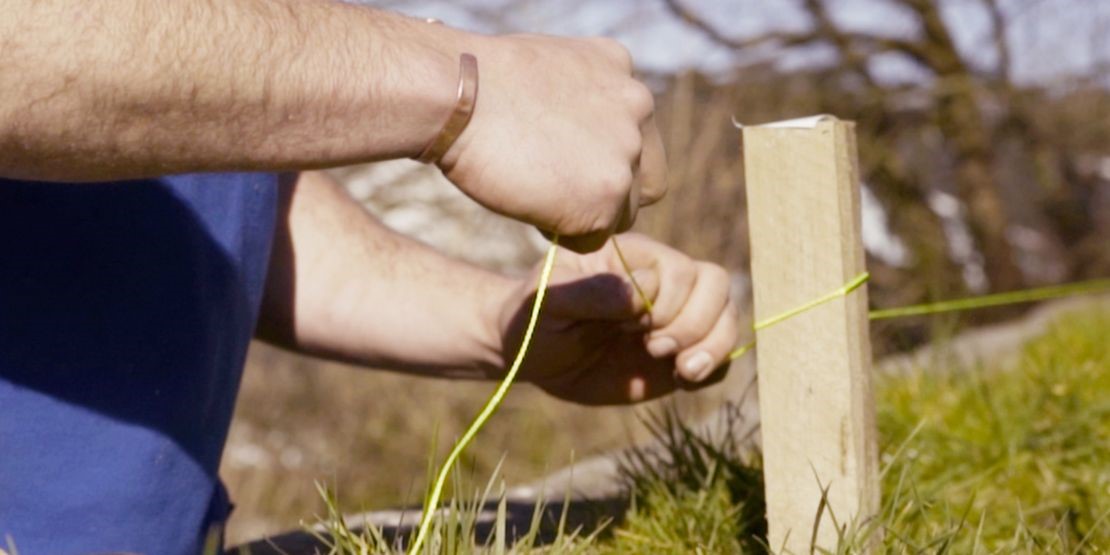
Step 8: Take Measure
We recommend that you use a batten that is cut to the same size as your fence panel. Place it flat on the ground (use a spirit level if necessary), identify and mark out the centre point of where each post will be. 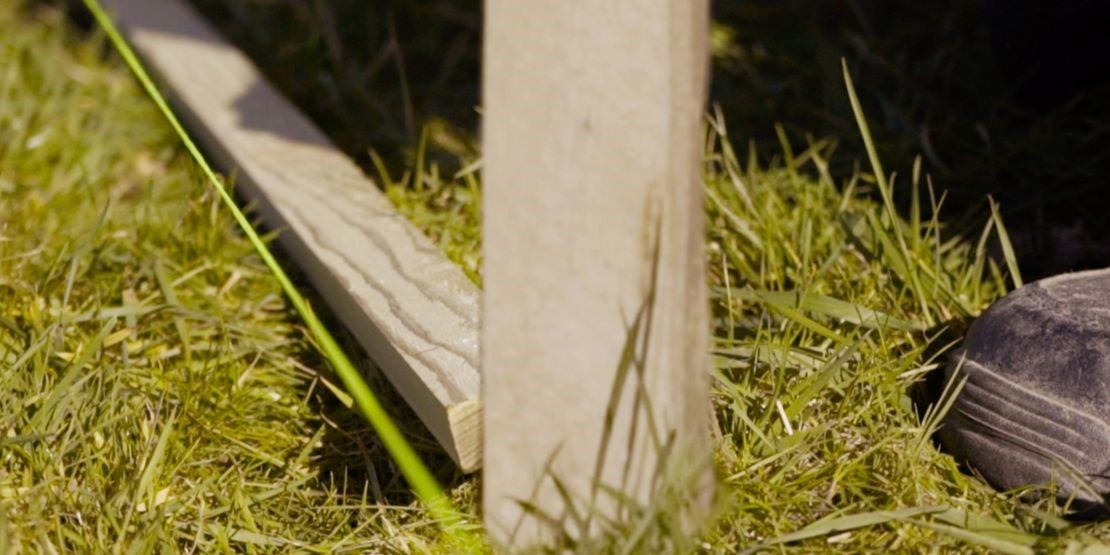
Step 9: Check it Out
Repeat the process for other fence panels you may have until you have a completely straight line and evenly-placed fence posts in place.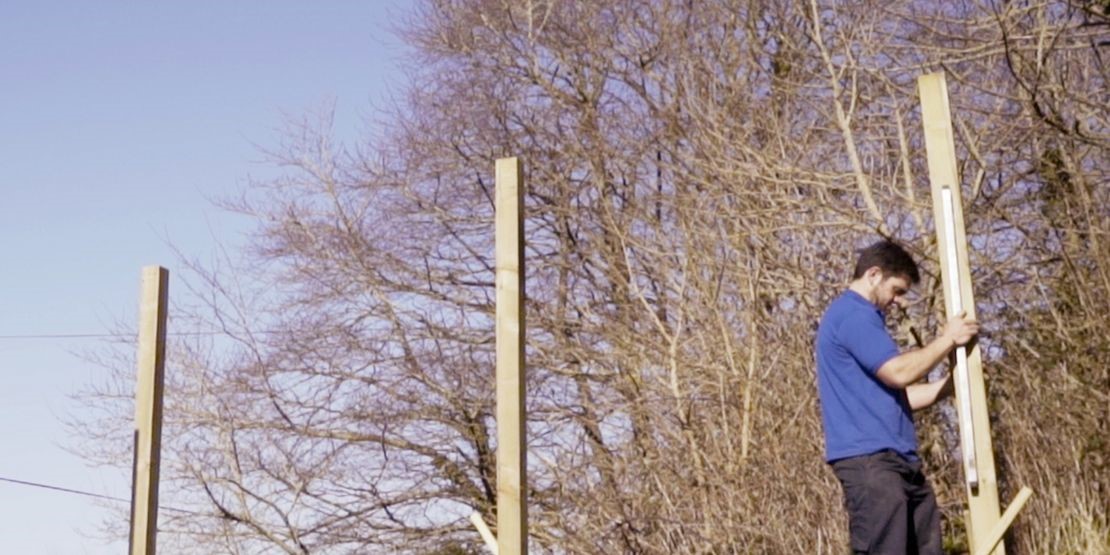
Step 10: Mark it Out
Our fence panels are fip treated to ensure longer life. However, to provide ultimate protection we recommend using pressure treated gravel boards. Mark the position of a metal L-bracket at the base of each post.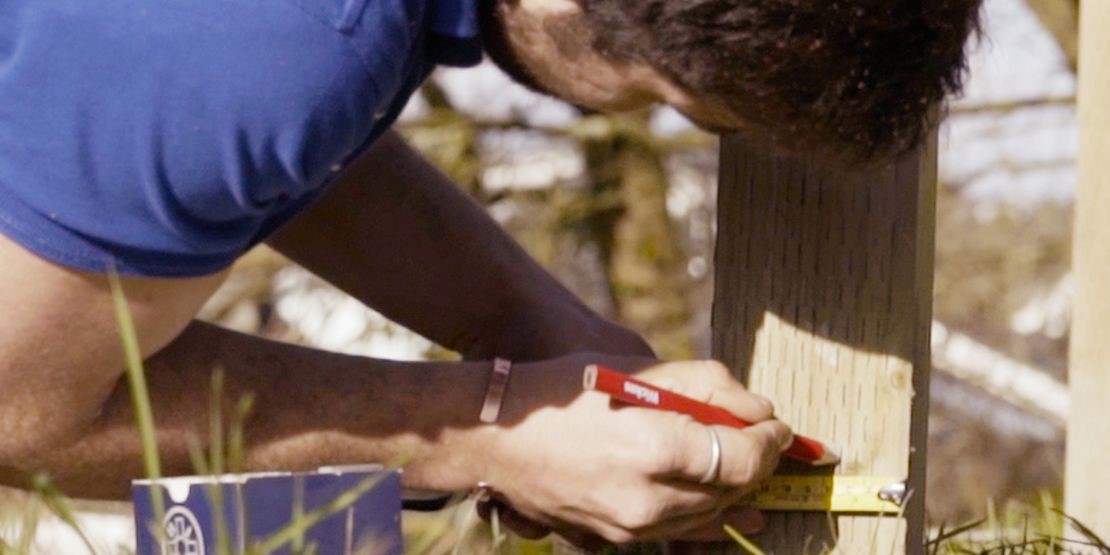
Step 11:
Once the position of the L-brackets has been marked, attach them to the fence post by using 20mm screws and securing them with the aid of a drill.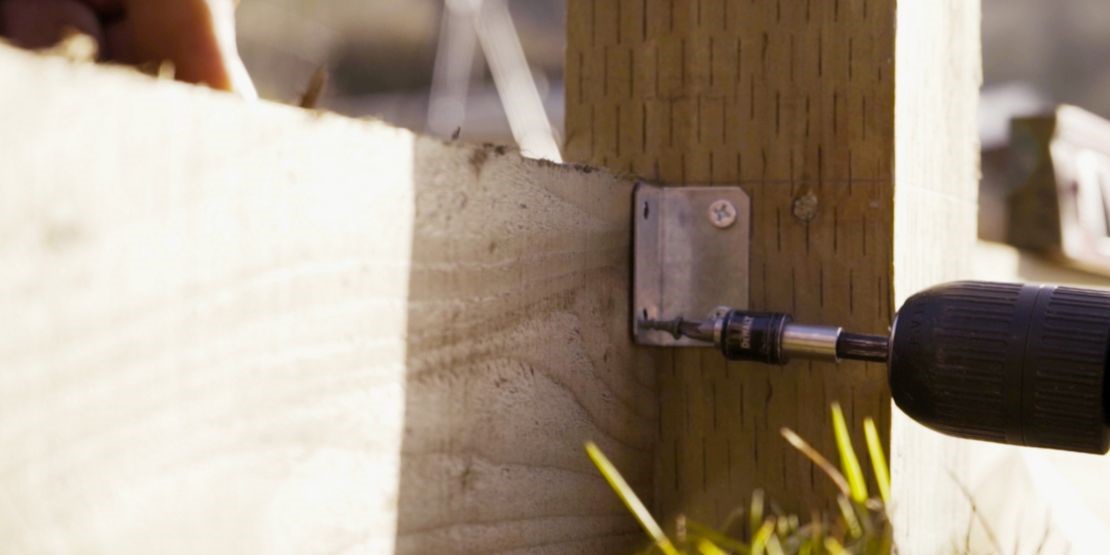
Step 12:
You will then need to secure 2 U-brackets to the inside of each post. We recommend positioning one of them 150mm from the top, and the other 150mm from the bottom of where the fence panel will be situated. To secure them in position we strongly recommend that you use exterior grade 35mm external grade screws.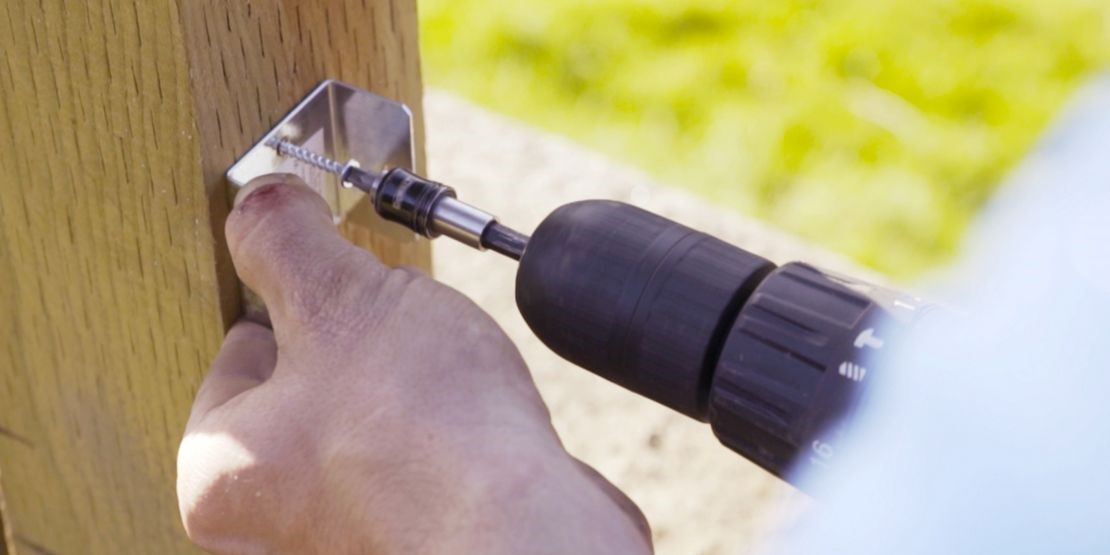
Step 13:
Once you have completed Step 12 (please refer to diagram – pictured above). Carefully insert the fence panels into position so that they fit in position in the brackets. It is highly likely that assistance will be required. Secure in place with the use of external grade 35mm screws to guarantee stability and longer life.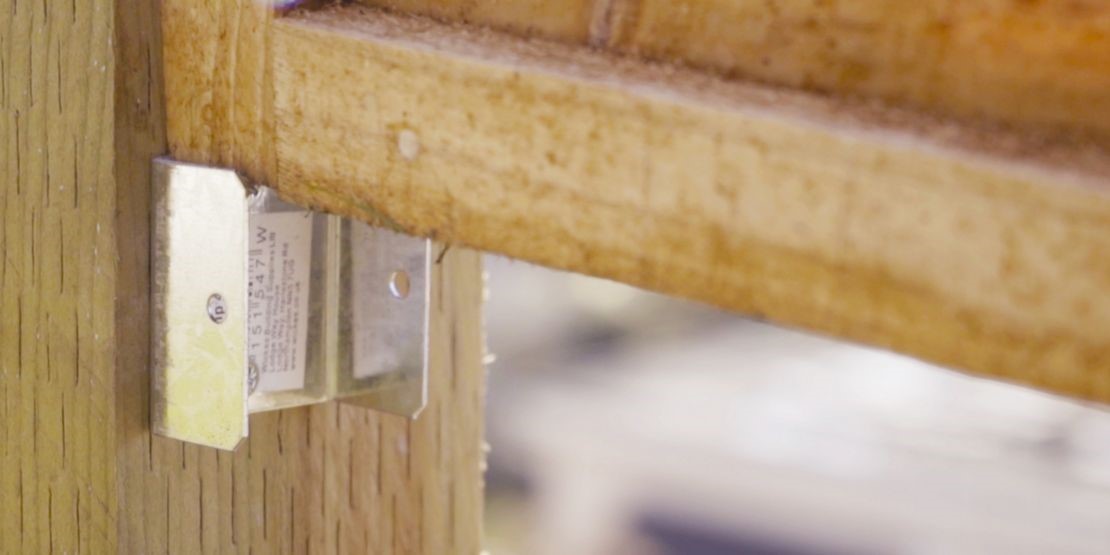
Step 14:
Before advancing to the next level you will need to ensure that any fence boards are level, particularly the next one. We recommend laying a piece of timber flat across the top of two consecutive posts. You may have to refer to a spirit level to guarantee that they are absolutely level and even. If necessary, you may have to trim off the tops of the fences and sand them to ensure that they are all even.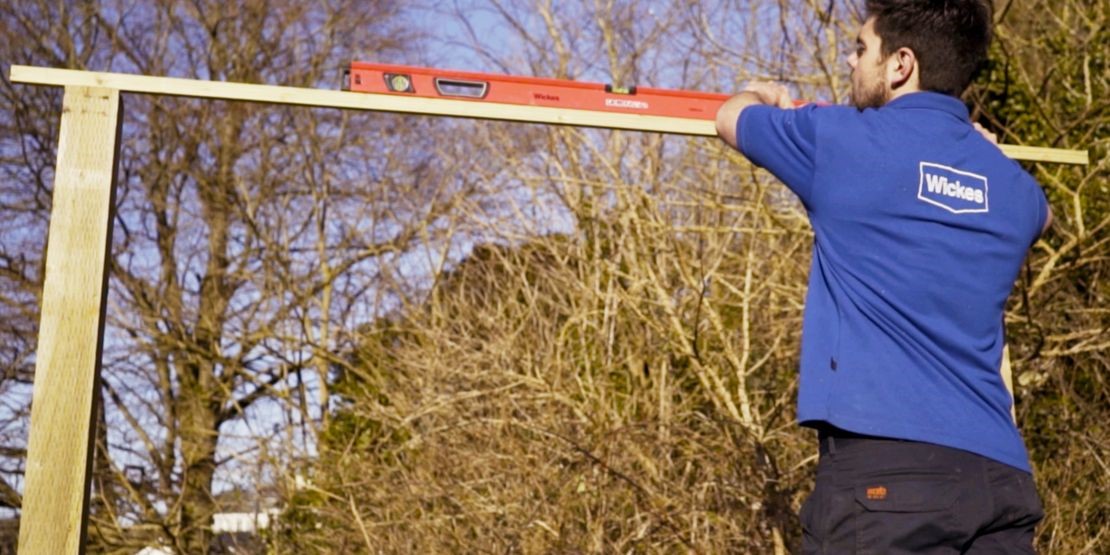
Step 15:
When marking a fence panel to fit the remaining space, please be sure that you measure out the section you need and mark out guideline for sawing. Your next step is to remove the framing battens from the front and the back of section you will be using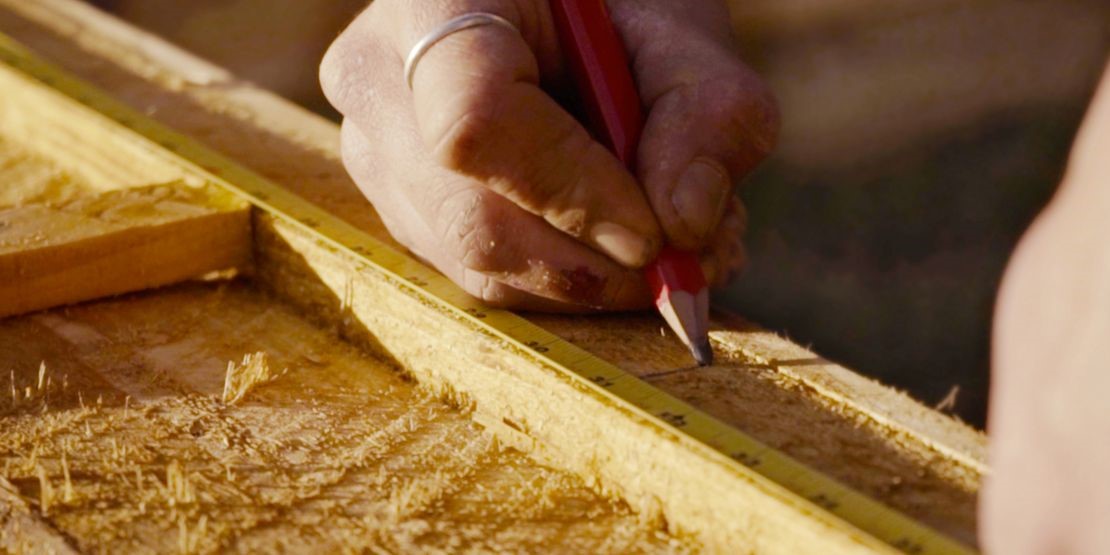
Step 16:
The next step is to carefully saw along the guide lines you have previously marked out (Please refer to Step 15. indicated above). Carefully re-insert the framing battens into the required position and fix the panel.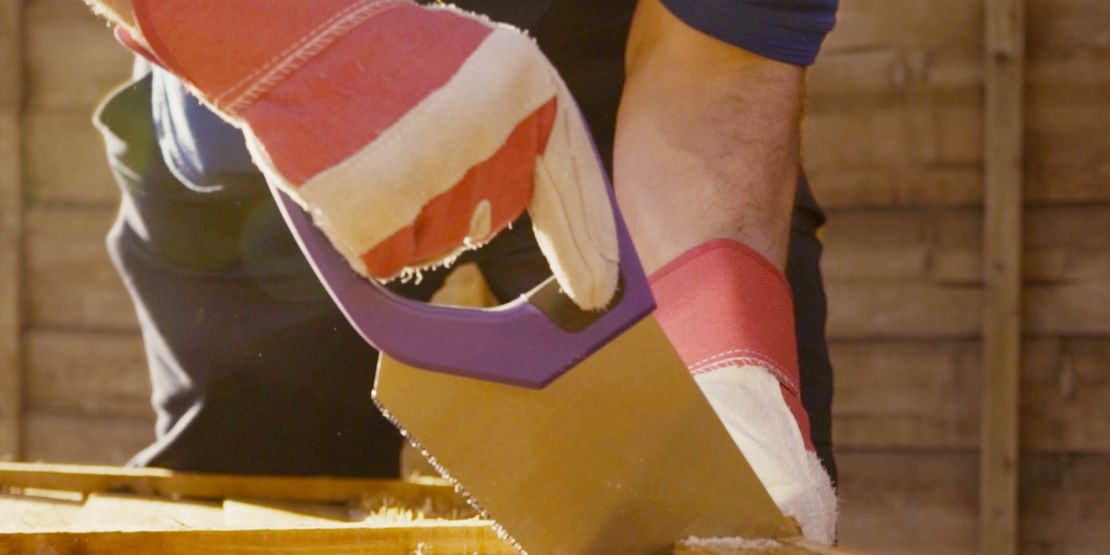
Step 17:
Once your fence panels and posts are finally in position the final touch is to insert a post cap. This can either be flat or decorative, depending on your wishes. Drill your hole in advance to ensure that the post cap fits in securely with a simple screw inserted in a central position.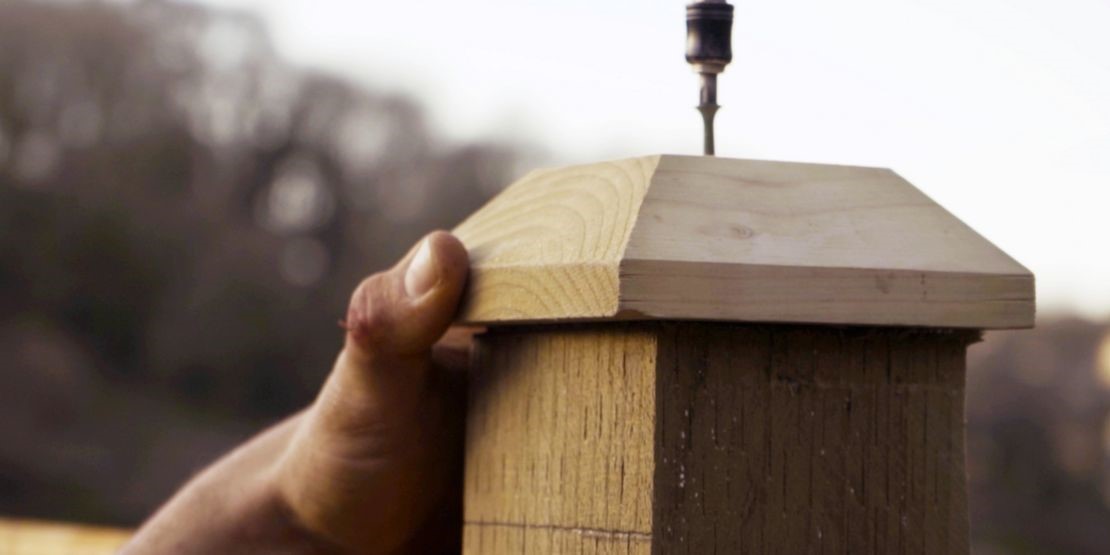
Maintenance Guidance
Aftercare Recommendations
- Please ensure that all cut timber and drill holes are treated with at least two coats of preservative.
- Once the fence is complete, apply a paint or wood stain to add a splash of color and further protect the timber. These come in a variety of colors so be sure to look at the range and choose the best option for you.
- Your fence panel, if dip-treated, will require a top-up of its coating at least once a year. If you have the time and energy it is possible to do in spring and autumn.